Forms
Share forms based on templates, customize layout and conditions, and manage form filling.
Forms let you share a template as a web-based questionnaire. When a respondent submits the form, the values they provide populate the template variables and generate a new document automatically. This is ideal for collecting information from external users, clients, or partners without giving them direct access to DocQ.
Sharing Forms
Before you can share a form, the template must have at least one variable defined.
Creating a Share Link
- Navigate to Document Templates and click the pencil icon on the template you want to share.
- Scroll to the Share section.
- Click Add share link.
- Click Create to generate the link.
- Click +Display details to expand the link settings.
You can create multiple share links for the same template, each with different settings (for example, different expiration dates or different enabled states).
Share Methods
Once a link is created, you can distribute it in several ways:
- Copy link -- Copy the URL to share via email, messaging, or any other channel.
- HTML iframe -- Copy the embed code to embed the form directly into an external website or portal.
- Plugins -- Use available integrations to share the form through other platforms.
Link Settings
Each share link has the following configuration options:
| Setting | Description |
|---|---|
| Name | A label to identify this share link (useful when you have multiple links). |
| Expiration date | The date after which the link becomes inactive and the form can no longer be submitted. |
| Enable link | Toggle to activate or deactivate the link without deleting it. |
Preview Before Submit
You can allow respondents to preview the generated document before finalizing their submission:
- Allow preview -- Toggle to enable the document preview step before submission.
- Sign document in preview -- When checked, the respondent can apply their signature during the preview step.
Save and Load Progress
For long or complex forms, you can enable the ability for respondents to save their progress and return later:
- Allow saving form data -- Toggle to enable the save/load feature.
- Expiration time -- Set how long saved form data is retained before it expires.
- Save/Load progress button -- When enabled, the form displays a button that lets respondents save or restore their progress.
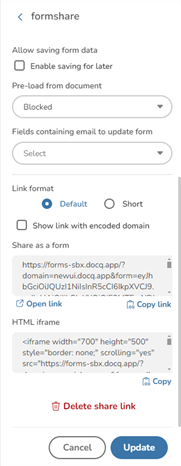
Link Format
You can choose between two link formats:
- Default -- The standard-length URL.
- Short -- A shortened URL that is easier to share in contexts with character limits.
Use the Open button to preview the form in a new tab, or the Copy button to copy the link to your clipboard.
Form Customization
Form customization is optional. If you skip it, DocQ automatically generates a default form layout based on the template's variables. To customize the form layout and behavior, click the Customize form button in the Share section.
Pages, Sections, and Elements
Forms are organized into a hierarchy:
- Pages -- Top-level containers. Multi-page forms display Next and Previous navigation buttons.
- Sections -- Logical groupings within a page.
- Elements -- Individual items within a section, either static content or template variables.
Static Content Elements
You can add non-interactive content to guide respondents through the form:
- Headers -- Section titles and headings.
- Paragraphs -- Descriptive text or instructions.
- Horizontal lines -- Visual separators between content blocks.
- Custom text -- Rich formatted content blocks.
Template Variable Elements
Drag template variables onto the form canvas to add them as input fields. Each variable element has a width setting measured in units out of 12 (following a 12-column grid). For example, a width of 6 takes up half the form width, allowing you to place two fields side by side.
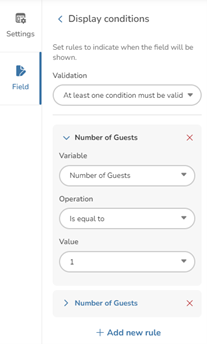
Display Conditions
Display conditions let you show or hide form fields dynamically based on the values entered in other fields. This creates a responsive form experience where only relevant questions are displayed.
To configure display conditions:
- Select the element you want to conditionally display.
- Click Edit display conditions.
- Choose the Field that the condition depends on.
- Select an Operation (the available operations vary depending on the field type -- for example, equals, contains, greater than).
- Enter the Value to compare against. You can enter comma-separated keywords to match multiple values.
- Click +New rule to add additional conditions.
- Choose whether all conditions must be met or any single condition is sufficient.
Form Settings
Configure global form properties:
- Document name structure -- Define how generated documents are named using a combination of: Text (static string), Variable (dynamic value from form input), Date, Time, or Custom date format.
- Form logo -- Upload a logo image to display at the top of the form. Supported formats:
.bmp,.gif,.jpg,.png,.svg,.tiff,.webp. - Header CSS -- Apply custom CSS to the form header area.
- Form completed title -- The heading displayed after successful submission.
- Form completed text -- The message body displayed after successful submission.
Advanced CSS Styling
For full control over the form's appearance, use the Custom CSS textarea to write your own styles. This allows you to override the default form styling with custom fonts, colors, spacing, and layout. Flexbox alignment properties are supported for precise element positioning.
Form Filling
This section describes the experience from the perspective of the person filling out the form.
Navigation
Multi-page forms display Next and Previous buttons to move between pages. Respondents can navigate back and forth without losing their entered data.

Required Fields
Fields marked as required display a red asterisk (*). The form cannot be submitted until all required fields are completed.

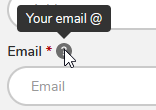
Hints
If a hint is configured for a field, a question mark icon (?) appears next to the field label. Hovering over or clicking the icon displays the hint text as a tooltip.
Conditional Fields
Fields with display conditions appear or disappear dynamically as the respondent fills in the form. Only visible fields are validated and included in the generated document.
Custom Text Fields
Custom text fields display a rich text editor allowing the respondent to enter formatted content.
Attachment Fields
Attachment fields let respondents upload files as part of their form submission. Supported file types are .pdf and .png.
E-Signature Fields
When a form includes signature variables, the respondent is prompted to provide their signature.
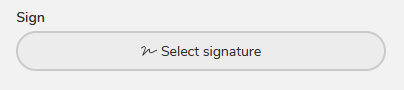
Signatures can be provided in two ways:
-
Predefined -- Select from signature templates if available.
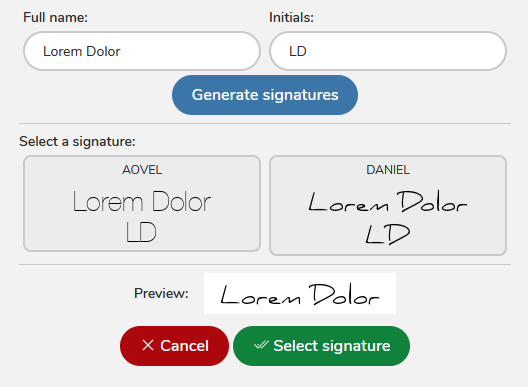
-
Drawn -- Draw the signature using a mouse, trackpad, or touchscreen.

Info
When the Preview mode is enabled, the respondent sees a Preview button instead of a Finish button. They can review the generated document and apply their signature during the preview step before finalizing.
Saving and Restoring Progress
If save/load is enabled on the form, respondents can preserve their progress and return later.
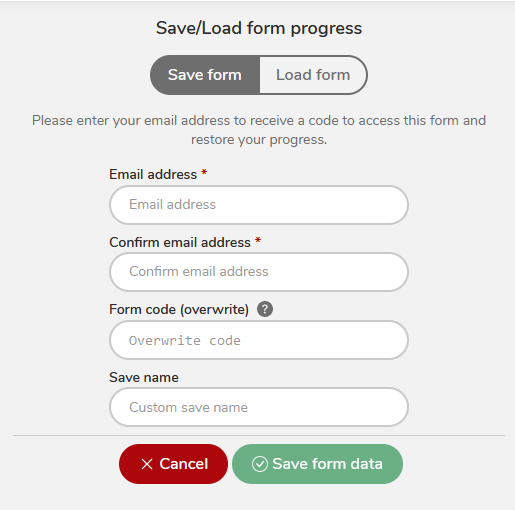
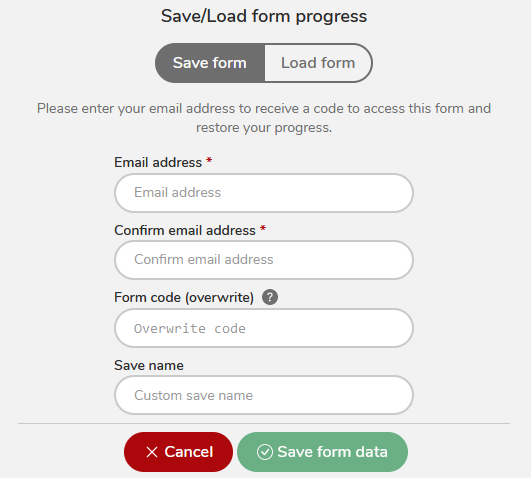
To save progress:
- Click the Save/Load progress button.
- Enter an email address and a form code (a memorable identifier).
- Confirm the save. If a previous save exists with the same email and code, it will be overwritten.
- Provide a save name for easy identification.
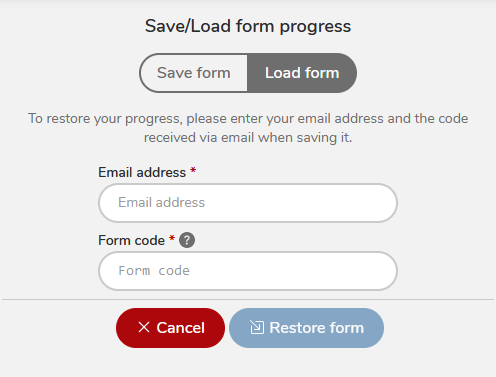
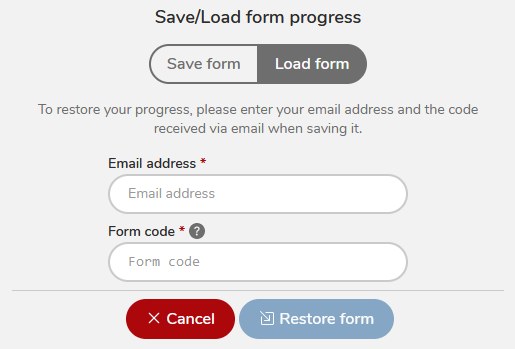
To restore progress:
- Click the Save/Load progress button.
- Enter the same email address and form code used when saving.
- The form fields are populated with the previously saved values.
Deleting Templates
To delete a template:
- Navigate to Templates > Document Templates.
- Locate the template you want to delete.
- Click the three dots menu icon.
- Select Delete template.
- Confirm by clicking Ok.
Warning
Deleted templates cannot be restored. If you need to recover a deleted template, contact DocQ support for assistance, though recovery is not guaranteed.
Deletion Restrictions
A template cannot be deleted if it is currently used by any of the following:
- A workflow step
- An SR plugin step
- A Form Attachment step
- A Form Share step
You must remove the template from all associated workflows and steps before it can be deleted.
Next Steps
- Templates Overview -- Learn about template creation methods
- Variables -- Configure the variable fields used in your forms
- eSignatures in Templates -- Add signature and attachment fields
- eSignatures Overview -- Understand how e-signatures work across DocQ