Departments & Roles
Create departments and roles to organize users and control document access within workflows.
Departments and roles allow you to model your organization's structure inside DocQ. They serve three key purposes:
- Reflect your organizational structure by grouping users into departments that mirror real teams or business units.
- Identify users in workflows so that tasks are routed to the right people at each stage.
- Control document access by granting visibility to documents at specific workflow stages based on department or role membership.
Departments
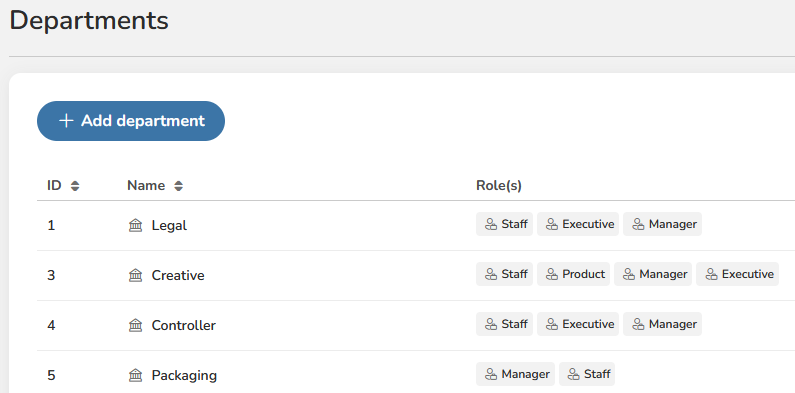
Departments represent the top-level organizational units in DocQ, such as Human Resources, Finance, Legal, or Operations.
Viewing Departments
Navigate to Users > Roles & Departments to see the list of all departments configured in your environment.
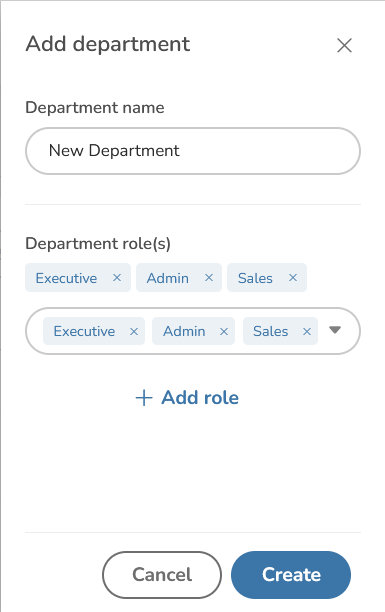
Creating a Department
- Go to Users > Roles & Departments.
- Click the Add button to open the create department dialog.
- Enter the department name.
- Click Save to create the department.
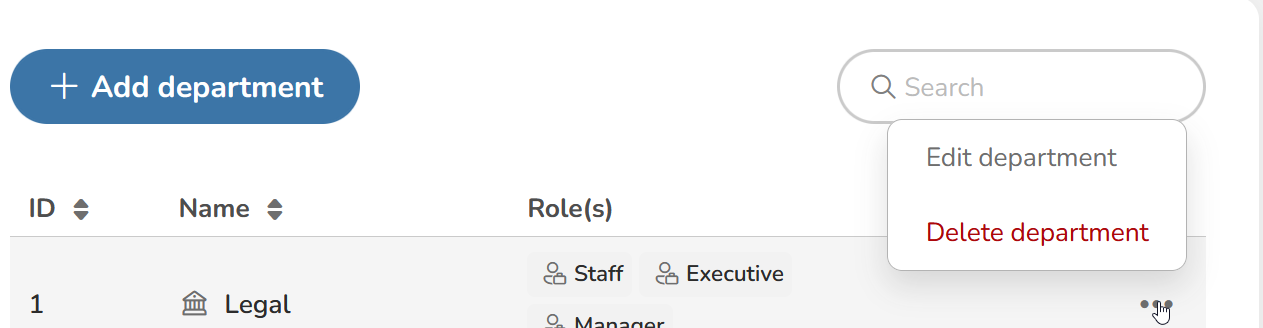
Editing and Deleting a Department
To modify or remove an existing department:
- Locate the department in the list.
- Click the Edit icon to update the department name, or click the Delete icon to remove it.
- Confirm your changes.
Warning
Deleting a department does not delete the users assigned to it, but those users will no longer be associated with that department. Review any workflows that reference the department before removing it.
Roles
Roles represent finer-grained positions within departments, such as Manager, Analyst, or Coordinator. Roles allow you to differentiate responsibilities and access levels among users who belong to the same department.
Key Characteristics
- A role defines a specific position or function within the organization.
- Roles can be reused across multiple departments. For example, a "Manager" role can exist in both the Finance and Operations departments.
- Roles are used in workflow configuration to determine which users receive tasks at each step.
Managing Roles
Navigate to Users > Roles & Departments and select the Roles tab to view, create, edit, or delete roles.
To create a new role:
- Click the Add button on the Roles tab.
- Enter the role name.
- Click Save.
Info
Roles and departments work together to define access and routing in workflows. A user can be assigned to one department and one or more roles within that department.
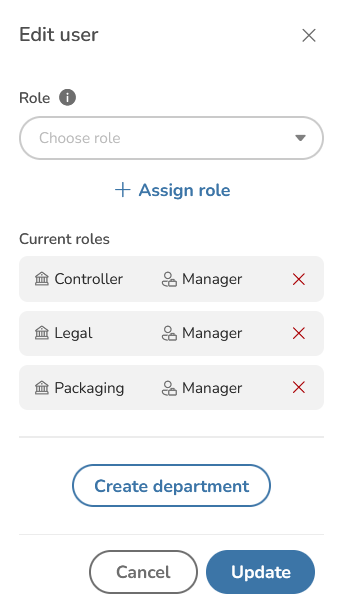
Assigning Roles to Users
Once departments and roles are configured, you can assign them to individual users:
- Navigate to the user list and select the user you want to update.
- Click the Edit option to open the user editing form.
- Scroll down to the Roles section.
- Use the dropdown to select the appropriate role for the user.
- Save your changes.
Next Steps
- Access Control — configure system and content permissions that work alongside departments and roles.
- Managing Users — create users and assign them to departments and roles.
- User Profile — manage individual profile settings including signature and interface preferences.