Access Control
Configure system and content permission groups to control access to DocQ features and data.
DocQ uses two complementary types of access control to govern what users can do and what data they can see:
- System access controls which platform features and functionalities a user can interact with.
- Content access controls which specific workflows, templates, and signature templates a user can access.
By combining both types, administrators can enforce granular, least-privilege access across the entire platform.
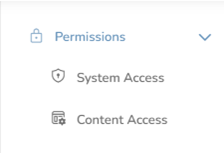
System Access
System access permissions determine which features and administrative functions are available to a user. Permissions are managed through permission groups — named collections of feature-level permissions that can be assigned to one or more users.
Creating and Modifying Permission Groups
- Navigate to Settings > Permissions > System access.
- Click Add to create a new permission group, or select an existing group to modify it.
- Enter a name for the group.
- Toggle individual permissions on or off as needed (see the full list below).
- Click Save to apply the changes.
Full Permission List
The following table lists every system permission available in DocQ. Each permission can be independently enabled or disabled within a permission group.
| Permission | Description |
|---|---|
| Documents | Access to the documents module and document listings |
| File editing | Ability to edit document files |
| File download | Ability to download document files |
| Document audit | Access to the document audit trail |
| File sharing | Ability to share files with other users or external parties |
| Redefine workflow/step | Ability to reassign or modify workflow steps on active documents |
| Document access | Access to view documents based on their status |
| Document templates | Access to create and manage document templates |
| Template download | Ability to download document templates |
| Form links | Access to create and manage form links |
| Customize forms | Ability to customize form layouts and fields |
| Signature templates | Access to create and manage signature templates |
| Groups | Access to manage user groups |
| Workflows | Access to create and manage workflows |
| Metadata | Access to configure and manage metadata fields |
| Departments | Access to manage departments |
| Roles | Access to manage roles |
| System access | Ability to manage system access permission groups |
| Content access | Ability to manage content access permission groups |
| Users | Access to manage user accounts |
| Configurations | Access to system configuration settings |
| Review emails | Access to review and manage email notifications |
| API tokens | Ability to create and manage API tokens |
| FTP accounts | Ability to create and manage FTP accounts |
| SmartRecruiters Webhooks | Access to configure SmartRecruiters webhook integrations |
| Reports | Access to reporting and analytics |
Info
Permission groups are additive. If a user belongs to multiple system access groups, they receive the combined set of permissions from all groups.
Content Access
Content access permissions control which specific workflows, templates, and signature templates a user can see and interact with. Unlike system access (which controls feature-level capabilities), content access controls visibility of individual data items.
Creating Content Access Groups
- Navigate to Settings > Permissions > Content access.
- Click Add to create a new content access group.
- Enter a name for the group.
- Save the group.
Granting Content Access
Content access is granted at the resource level. When you create or edit a workflow, document template, or signature template, you can specify which content access groups are allowed to use that resource.
This means that a user must:
- Have the appropriate system access permission to use the feature (e.g., the "Workflows" permission).
- Belong to a content access group that has been granted access to the specific workflow or template.
Warning
If a user has system access to a feature but does not belong to a content access group with visibility into a specific resource, they will not be able to see or interact with that resource.
Defining User Access Levels
To assign permission groups to a user:
- Navigate to the user list and select the user you want to configure.
- When creating or editing a user, locate the System access and Content access sections.
- Associate the user with one or more system access groups and content access groups as needed.
- Save the user record.
For step-by-step instructions on creating and editing users, see Managing Users.
Document Access Statuses
Within the Document access permission, users can be granted visibility into documents based on their status. The available document statuses are:
| Status | Description |
|---|---|
| Active | Documents currently in progress within a workflow |
| Completed | Documents that have finished all workflow steps |
| My queue | Documents assigned to the current user and awaiting their action |
| My completed | Documents the current user has completed their assigned step on |
| My acted on | Documents the current user has previously acted on at any workflow step |
Info
Granting access to specific document statuses allows you to create focused views for users. For example, a department manager might need access to all Active and Completed documents, while a specialist only needs to see their own queue.
Next Steps
- Managing Users — create users and assign them to permission groups.
- Departments & Roles — organize users into departments and roles that complement access control.
- User Profile — manage individual profile settings and e-signature preferences.